
Continuing on from last week’s Pizza Sauce recipe, today I’m focusing on the Pizza Dough. While the sauce is the part that holds everything together, the dough is the foundation of a good pizza. It’s arguably the most important part because without it, there’s no pizza at all! This easy recipe will have you making authentic home-made pizza dough in no time.
Around the world, there’s so many different ways to serve pizza and each has their own special dough. Some bases are tall, fluffy and bread-like, others are deep dish style, and others are thin and crispy. This dough falls into the latter category – it’s thin enough to be a little crispy, but still puffs up on the inside. It’s the perfect dough for making family pizzas and it doesn’t sit too heavy after eating. This recipe is also handy because it can be ready in just over an hour, so you can satisfy those last-minute pizza cravings without having to plan ahead.
Easy home-made pizza dough
If you’ve previously tried making dough at home and not had much success, this recipe is for you. Believe me, I’ve had my fair share of dough disasters but this one is almost foolproof. It’s no mess, no fuss, quick and easy. Before we start, I should cover off each of the ingredients. I like to be able to whip up pizza whenever I feel like it and so I only use pantry staples.
- Flour: It all starts with the choice of flour. A lot of recipes for pizza will call for strong or bread flour. I have tried using these flours a few times and honestly the difference is marginal. If you have them available, by all means use them, but I almost always use plain flour and it works a treat.
- Yeast: I always have dried yeast in the pantry because it’s so easy to use. Dried yeast gives a consistent result and stores for up to 12 months. Just be sure to keep the dried yeast refrigerated once the pack is open so that it stays fresh. If the yeast is old, the pizza dough won’t rise and the resulting pizza will be rock hard.
- Sugar: The sugar in this recipe is to help feed and activate the yeast. It’s not for flavour so don’t just remove it thinking you’ll save a few extra calories!
- Salt: Unlike the sugar, salt is added purely for flavour. That said, I’m really not a fan of adding too much salt to food. It’s incredibly bad for you so I try to avoid it as much as I can. Consequently there’s only about a teaspoon of salt in this recipe. Feel free to add more to your liking, but only after all the other ingredients are combined. If you mix the salt in too early, it will kill the yeast and your dough won’t rise! I prefer to use table salt because it’s finely ground. Sea or Kosher salt are perfectly good alternatives.
- Water: The water is the other key ingredient in the dough. In order to activate the yeast the water needs to be tepid. I find that 50ºC is the sweet spot for good yeast activation. Anything below about 40ºC will risk the yeast not performing and anything over about 60ºC risks killing the yeast entirely. Use a thermometer if you’re not sure. Generally though, if you can comfortably sit your finger in the water and it’s warm but not hot, it should be about right.
Preparing the dough
The process of making pizza dough couldn’t be simpler. Firstly prepare the yeast by placing the warm water, dried yeast and sugar into a measuring jug or small bowl. Let the yeast stand for about five minutes so that it has a chance to activate. When small foamy bubbles are visible on the surface, the yeast is ready. If there’s no sign of any foaming, the yeast may be stale and in need of replacement.
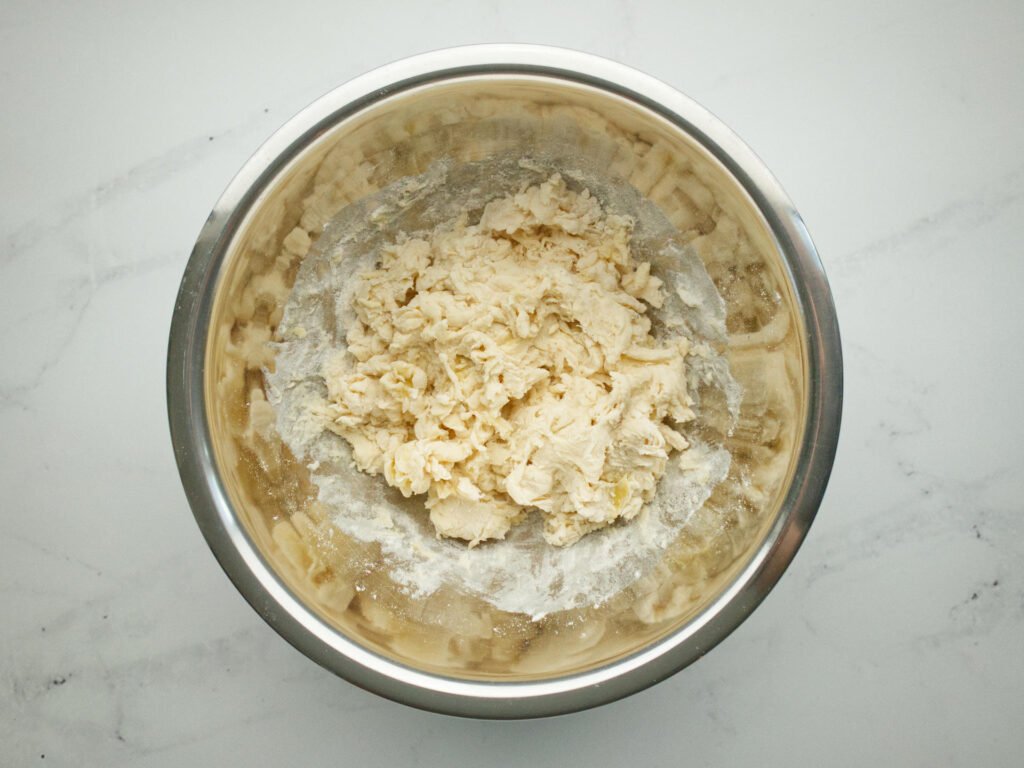
Once the yeast mixture is ready, combine all the ingredients (except the salt) in a mixing bowl. Bring the mixture together using your hands. I like to use one hand to mix and keep the other clean. Doing it like this means I’m able to still hold the bowl and touch things around the kitchen without making a mess. Once the mixture is roughly combined, add in the salt.
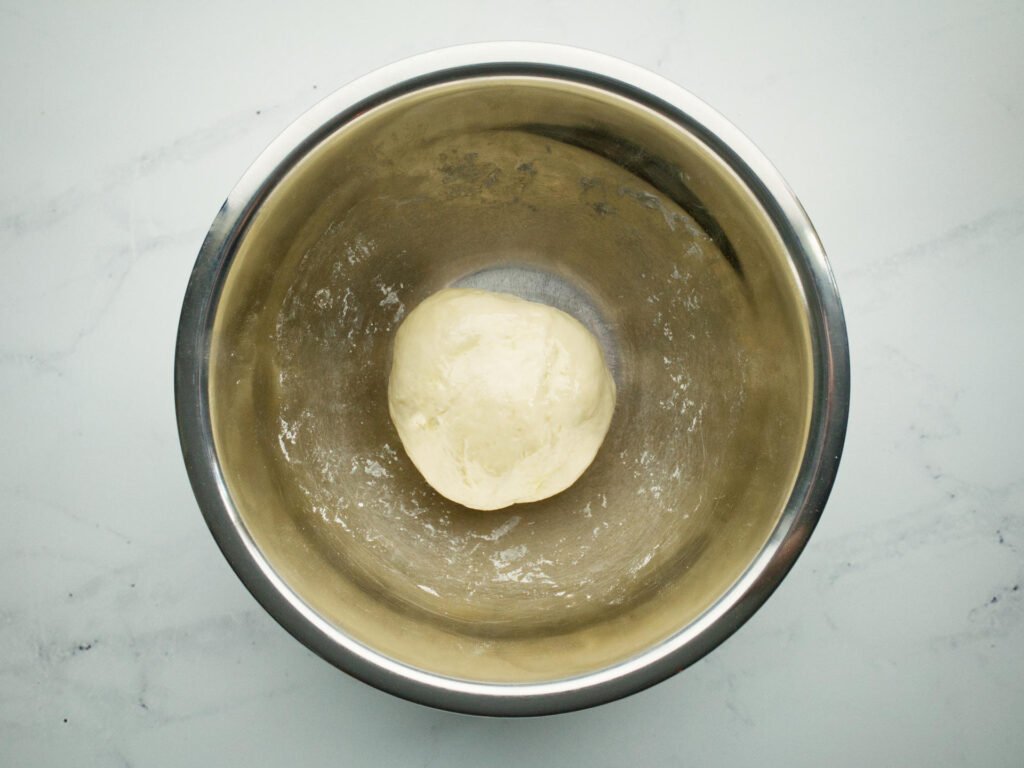
The dough will be quite sticky at first. The dough may seem too wet, but avoid the temptation to add any flour at this stage. Continue to knead until a dough forms. Keep rubbing your fingers together to remove any bits that become stuck to your hand and after a few minutes it should form a neat ball.

Place yeast mixture and oil into the flour Roughly combine and add salt Knead until a dough forms Continue until smooth and elastic

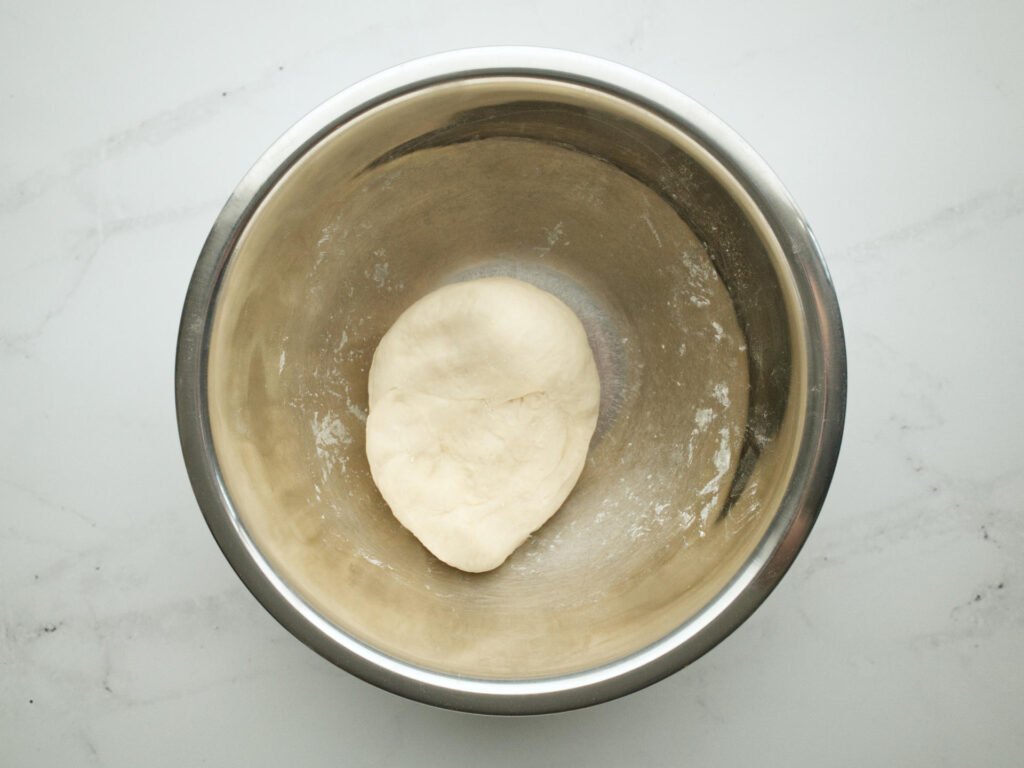
Now check to see if the dough is too wet. As a general rule, if the dough ball still sticks to your hand, or to the bowl itself, add a pinch of flour and knead it through. Only add the flour one pinch at a time as you won’t need much to dry the mixture out. If you like, you can complete the kneading process on a lightly floured surface, but I prefer to just do it all in the mixing bowl. It makes cleanup so much easier and it’s not a difficult dough to knead.
Proving in a warm place
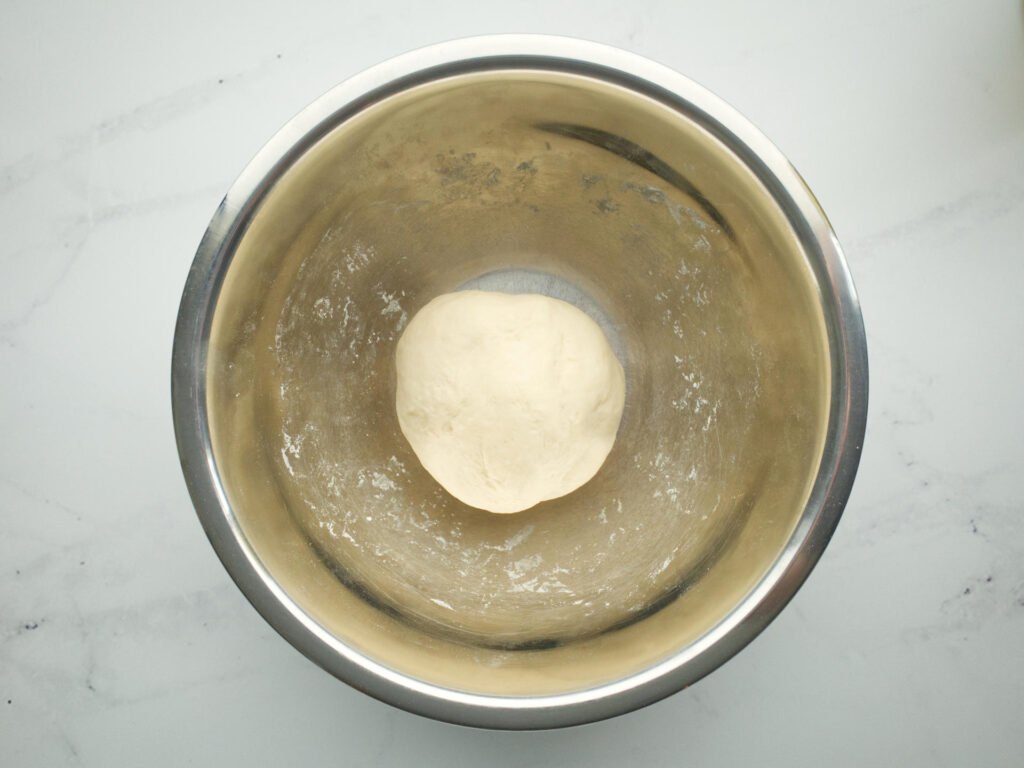
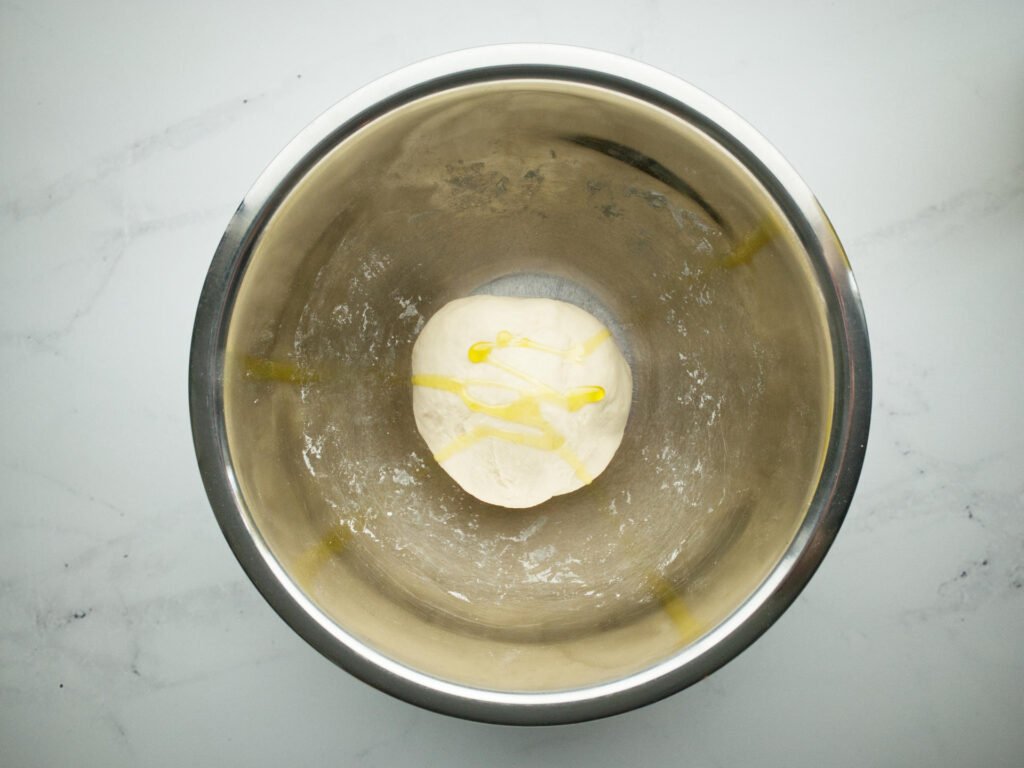
The pizza dough is ready to prove when it is smooth and elastic. Test it by giving it a knead and letting go. If the dough springs back a bit on its own, it’s good to go. Add a little olive oil to the surface and rub to coat. This will prevent it from sticking to the bowl while proving.
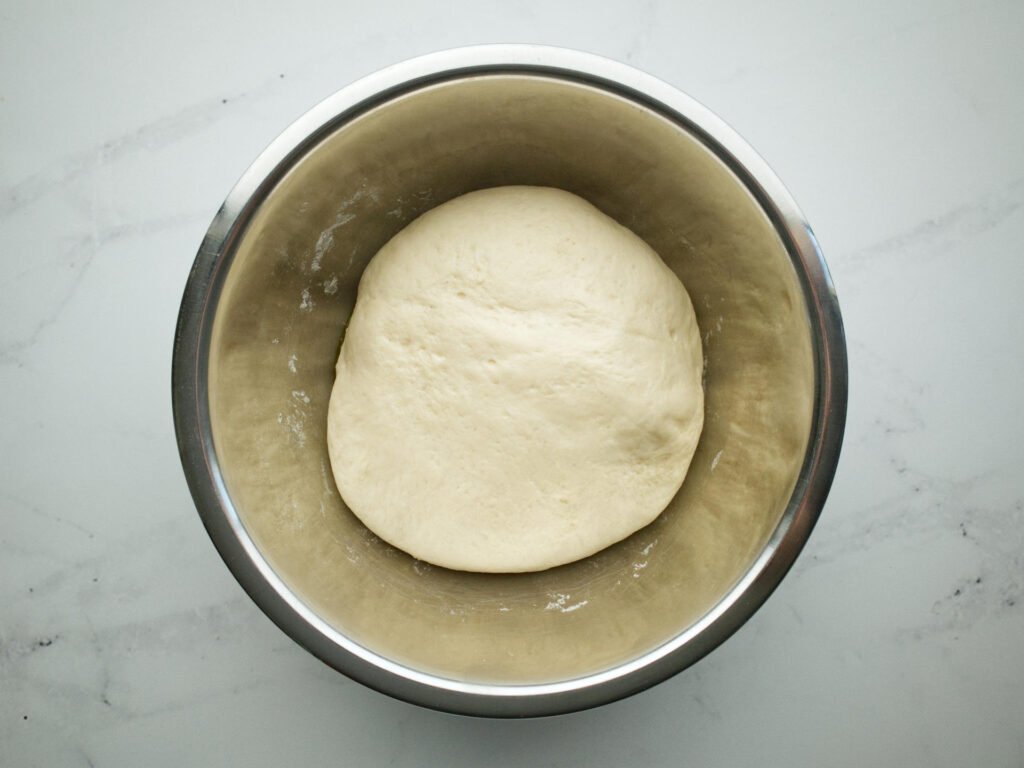
Cover with cling wrap or a damp tea towel and set aside in a warm, draught-free place for about an hour. The warmth is important as it helps the yeast to grow. If you’re in a particularly cold environment, a good trick is to warm the oven ever so slightly, then turn it off and place the bowl inside.
When it has roughly doubled in size, the dough is ready to be shaped into bases.
Coat with olive oil Cover and prove for 1 hour in a warm place Dough is ready when doubled in size
Letting the yeast mature
Although the dough can be proved straight after kneading, it can also be made in advance. Preparing it in this way will give the yeast more time to fully mature. A more mature yeast will add flavour to the dough and also helps to prevent you feeling bloated after eating. It’s completely optional to do this, but it’s useful to know.
In order to mature the yeast, instead of proving right away, follow the recipe up to the point of coating the dough with olive oil. Cover the bowl with cling wrap and place it in the refrigerator. Chill overnight and then about an hour before cooking, take the dough out of the refrigerator and stand in a warm, draught-free place. Prove the dough like this for an hour and then continue the recipe as normal.
As this recipe is enough to make four pizzas, sometimes I’ll split the dough in half after kneading. I’ll put one half into the fridge and then continue with proving the other half. It’s a great shortcut for having freshly cooked pizza over two days without having to make the dough from scratch.
⭐️ Enjoying this recipe? Subscribe to my newsletter to be one of the first to receive my latest updates direct to your inbox.
Shaping pizza dough
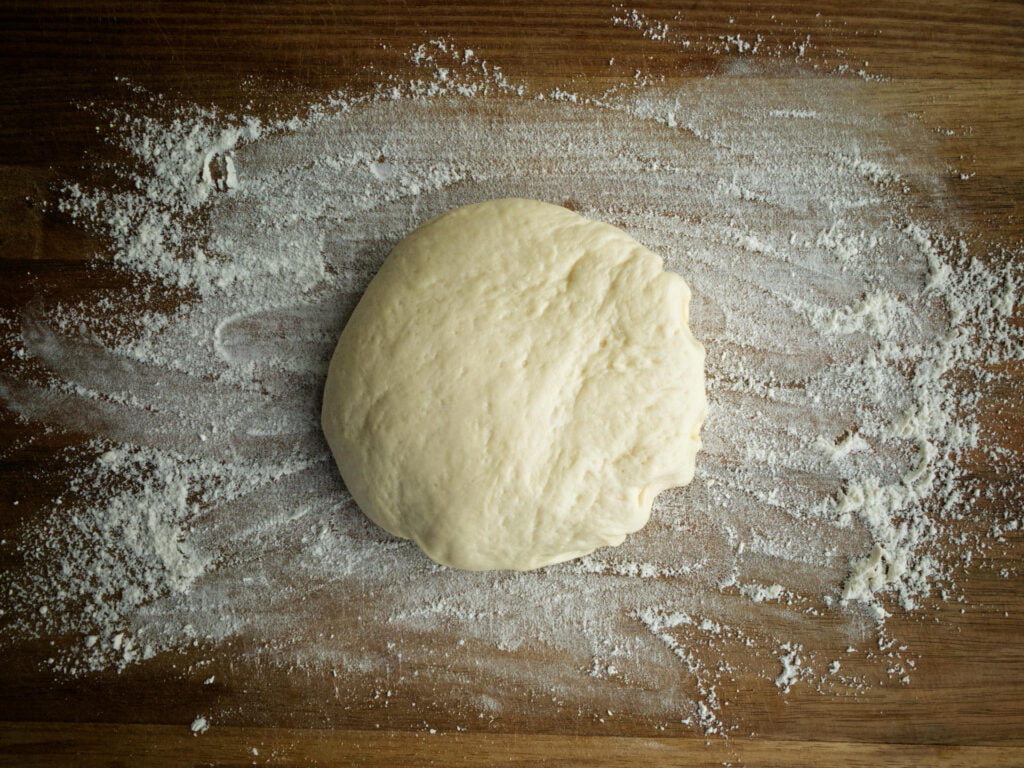
When the dough has finished proving, it’s ready to be shaped into a pizza base. There are a couple of ways to do this but the way I prefer is to shape by hand. It’s possible to shape with a rolling pin too, but I find it a lot more difficult to get a consistent round shape and even thickness.
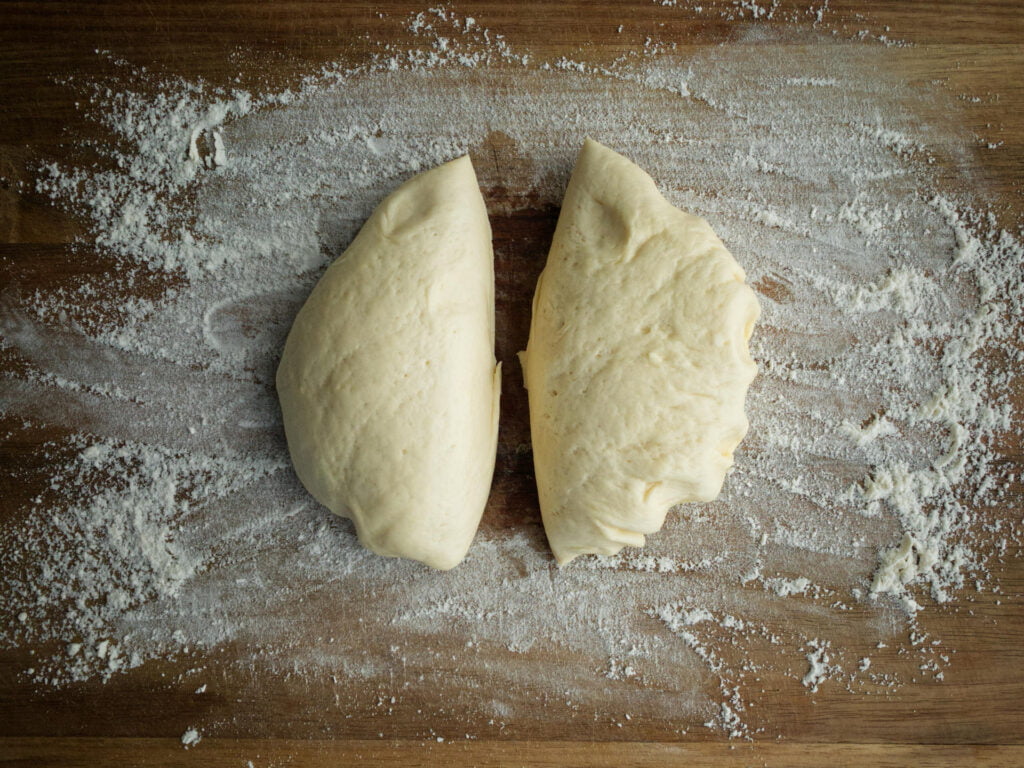
Start by placing the dough on a floured surface. Evenly portion it into the number of pizzas required. This recipe makes four pizzas that are about 30cm in diameter. I find 30cm is the perfect size for my bench top pizza oven, but you can easily make them larger or smaller depending on your requirements.
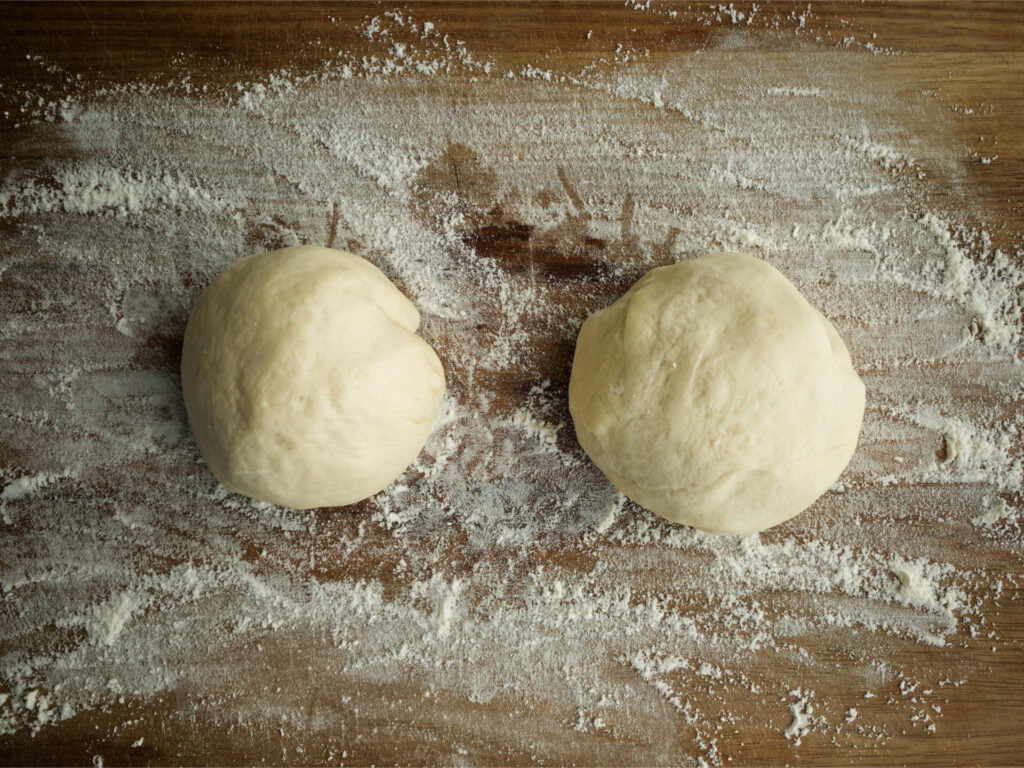
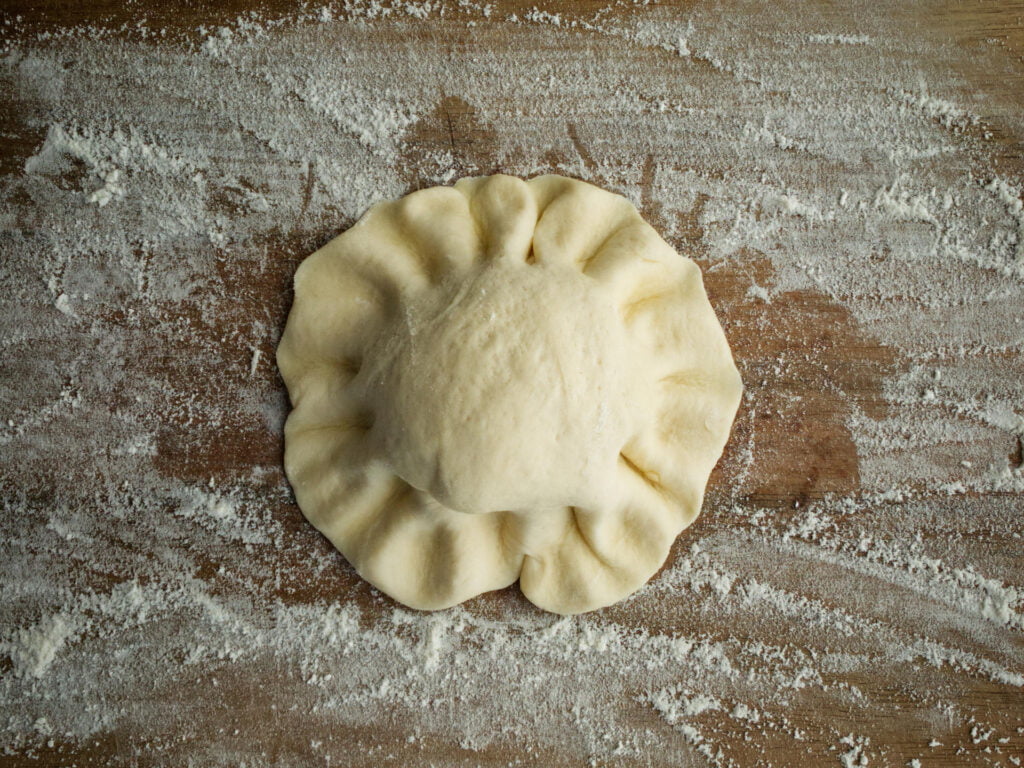
Take each portion of dough and form it into its own ball. One at a time, take each piece of dough and use your fingers to press down around the edges to form a flat surface with a mound in the middle. Aim to flatten out an area about 3-4cm wide all the way around the mound of dough. Now flip the pizza dough over and repeat the process, pressing down on the dough mound to extend the flat area by another 3-4cm. Finally, flip it again and press down on the mound using the palm of your hand.
Place the dough on a floured surface Divide into equal portions Shape into balls Press around outside to form a flat surface Flip dough and repeat Flip dough and press mound with palm Shape into final pizza base using splayed fingers
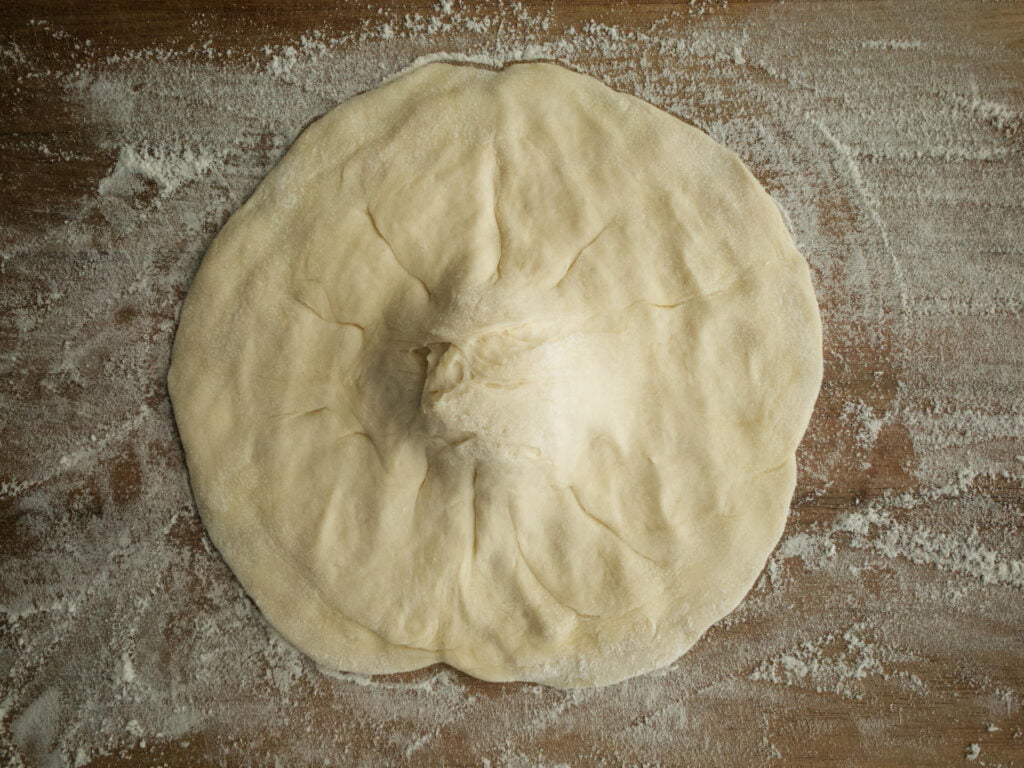
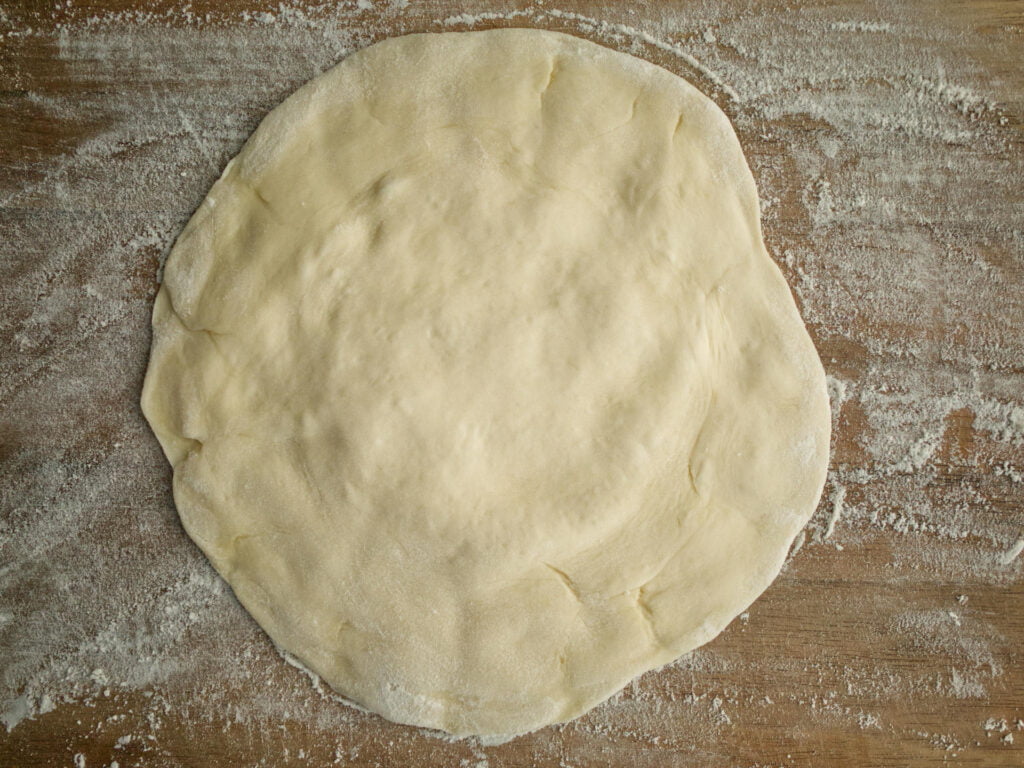
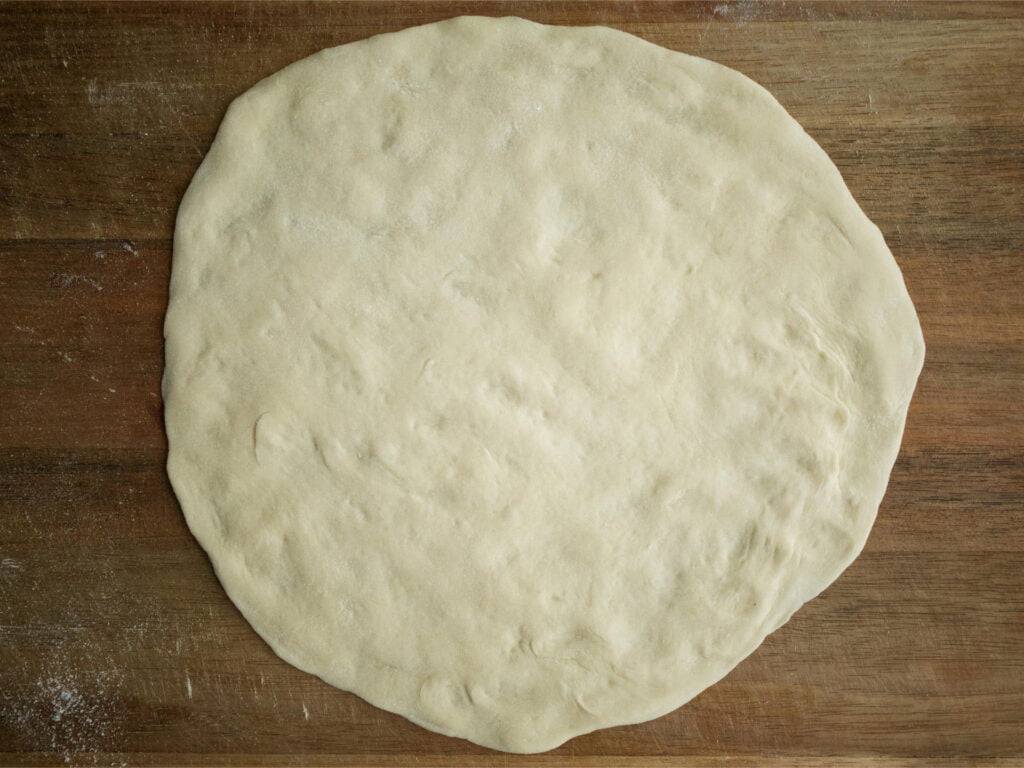
The last step is to thin out the base to your preferred thickness. Keep in mind that the dough will rise slightly when cooked so it needs to be quite thin at this point. I like to work the base by splaying my fingers and rotating the dough. This evenly pushes out the edges without getting any holes. Again, you can use a rolling pin if you prefer.
Time to make pizza!
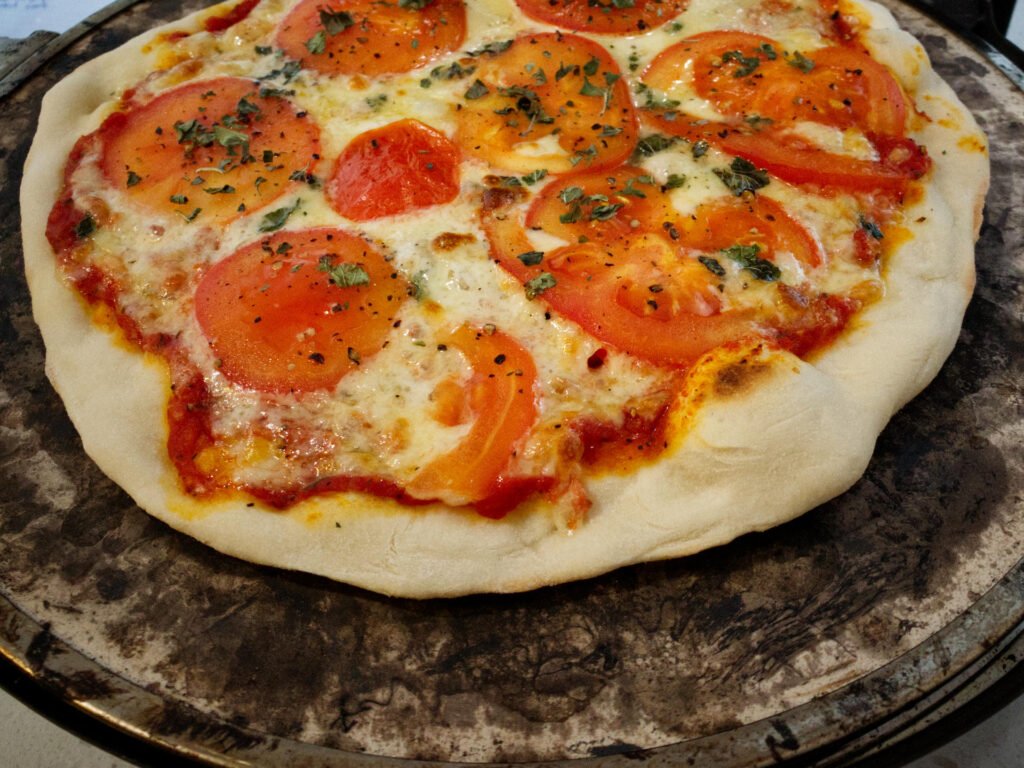
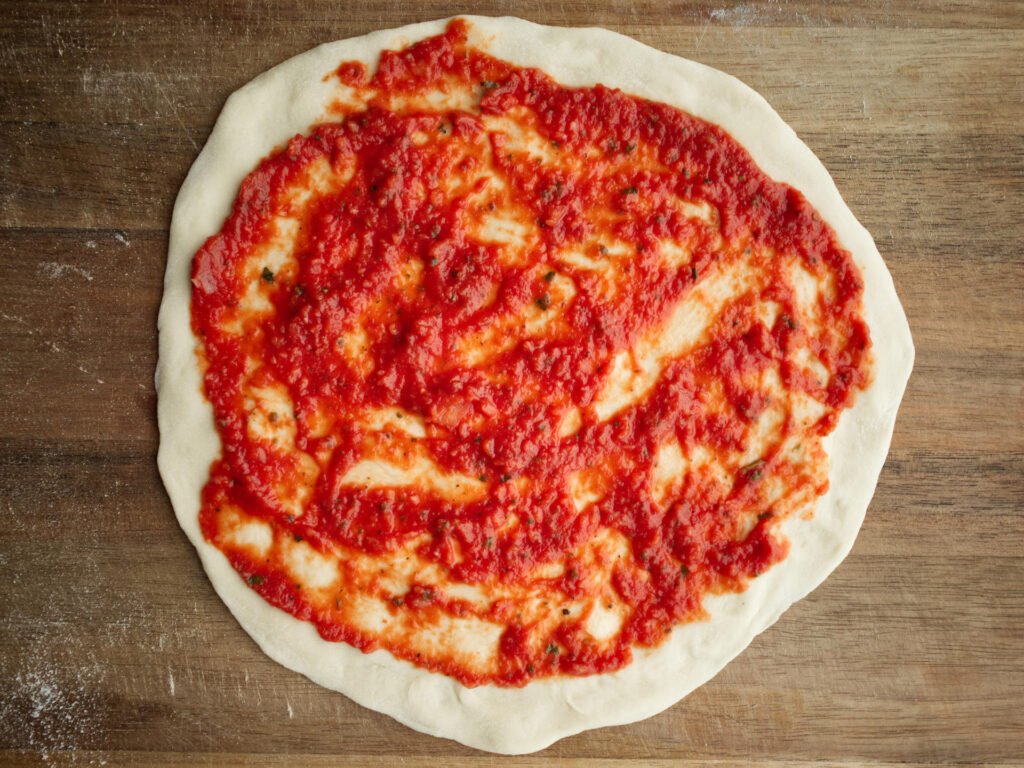
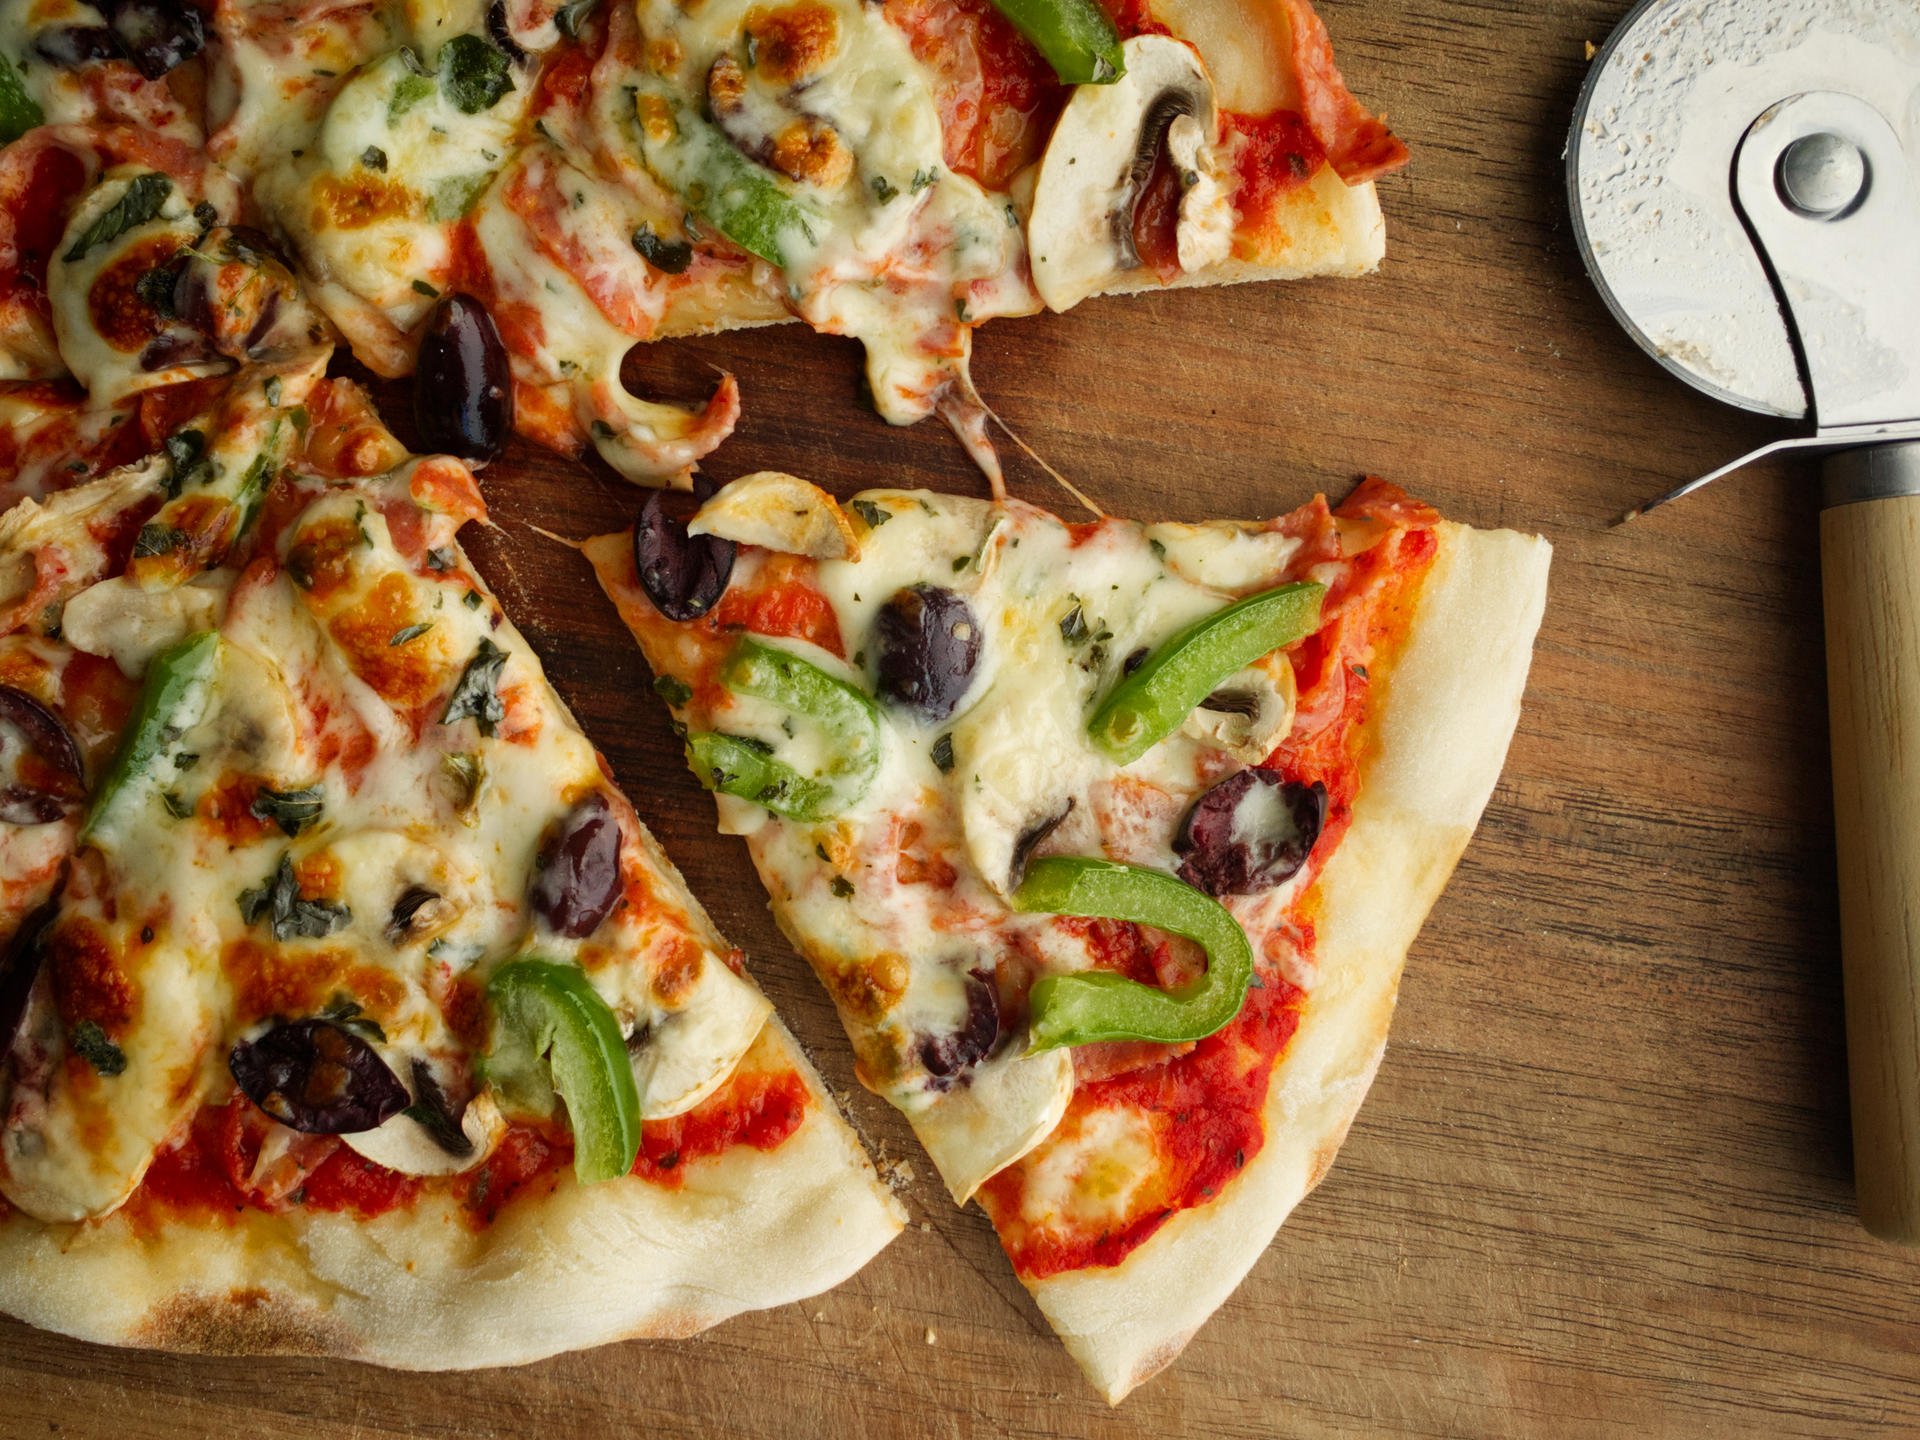
Once the pizza dough is shaped, the pizza base can be used immediately. I like to coat mine with my home-made Pizza Sauce and a selection of classic toppings. The choice from here is yours!
When it comes to cooking, place the pizza in a very hot oven. For the best results, use a pizza stone and follow the product directions for cooking times. It will help to cook the base right to the centre of the pizza and it makes it extra tasty. I like to use my bench top pizza oven which has a stone built in. It makes amazing pizzas with little fuss. There’s also a wide variety of pizza trays that can be used in a conventional oven.
Pizza Dough
Ingredients
- 450 g plain flour, plus extra for shaping
- 270 ml water, warmed to 50ºC
- 4 g caster sugar
- 7 g dried yeast
- 15 ml olive oil, plus extra for greasing
- 5 g table salt
Instructions
- In a small measuring jug, combine the warm water, sugar and dried yeast. Stir vigorously for a few seconds to dissolve. Stand for about 5 minutes, or until small bubbles form on the surface.
- Meanwhile, place the flour into a large mixing bowl. Make a well in the centre and add the olive oil, followed by the yeast mixture. Using one hand, roughly combine the ingredients and then add in the salt. Do not add the salt earlier, otherwise it will kill the yeast. Continue mixing until a dough forms and then knead in the bowl for 5-10 minutes until smooth and elastic. If the dough is sticky, add a little extra flour until it kneads cleanly.
- Form the dough into a round ball shape and place it in the centre of the bowl. Add a little olive oil and rub to coat. Cover the bowl with cling wrap and place in a warm spot to prove for 1 hour, or until the dough has roughly doubled in size.
- Transfer the dough to a lightly floured surface. Using a dough cutter, divide into 4 equal portions and form each into a ball shape. Using your fingers, press around the outside of each ball to form a flat edge with a mound of dough in the centre. Flip the dough over and repeat the process, working your way a little further into the central mound. Continue flipping and pressing until the dough forms a large circular pizza base of even thickness. Repeat for each ball of dough.
- The pizza bases can be used immediately.
Notes
- Make it in advance: Preparing this dough the day before will give the yeast more time to mature. After coating the dough with olive oil, instead of proving, place the bowl in the refrigerator and chill for up to 24 hours. Take the dough out of the fridge and allow it to sit in a warm spot to prove for 1 hour. Then continue the recipe as normal.
- Pizza sauce: For a quick and easy tomato sauce that will take your homemade pizza dough to the next level, try my Pizza Sauce recipe.
Have you tried this recipe?
Let me know how it went! Leave a comment below, mention @sthsidekitchen and tag #sthsidekitchen on Instagram. You can also follow me @sthsidekitchen on Twitter and Pinterest.
📬 Don’t forget to subscribe to my newsletter to be one of the first to receive my latest recipes direct to your inbox.