
There’s nothing like traditional hot cross buns at Easter. Served warm, they’re a tasty afternoon treat to enjoy with a cup of tea or coffee. They’re so good that some supermarkets in Australia have taken to selling them all year round but there’s nothing quite like making them in your own kitchen. The tantalising smell wafting through your home is so irresistible, you’ll want to try to rip them out of the oven before they’re done baking!
These buns are a real crowd pleaser. They are just perfect for when you have family and friends dropping around for afternoon tea. The recipe makes a dozen buns, so there’s plenty to go around. Plus they don’t have any of the preservatives and additives like the store-bought ones.
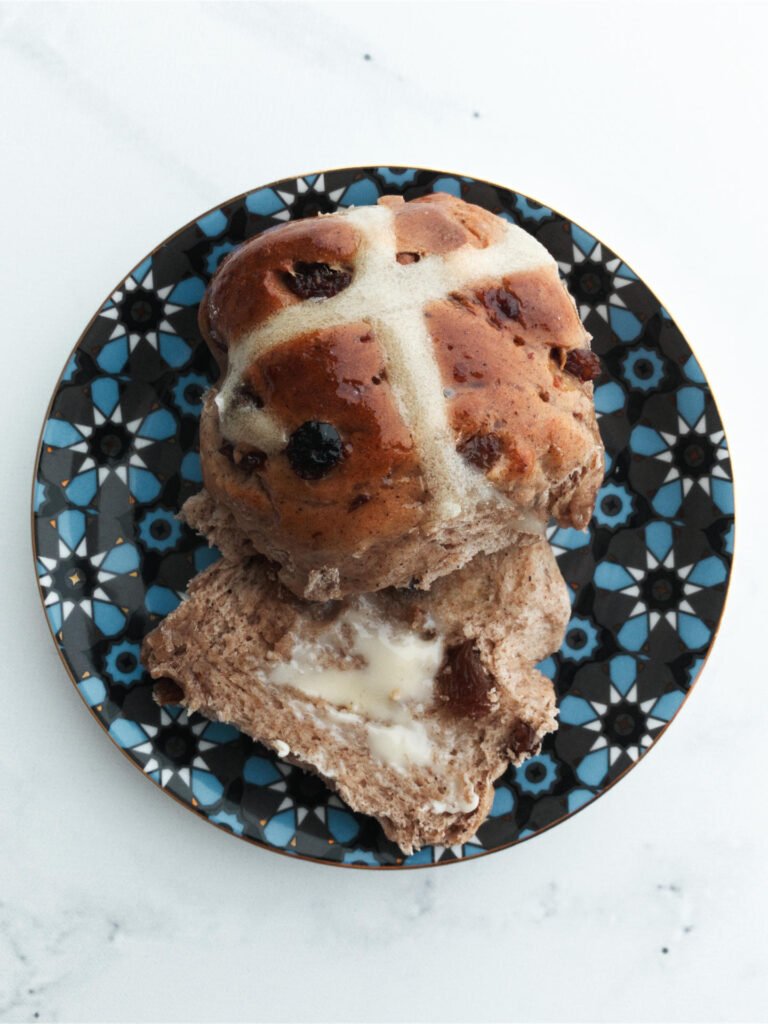
Serve them warm with a good lashing of quality butter and I’m sure you’ll want to add this recipe to your regular baking roster!
How to make hot cross buns
Although making your own hot cross buns may seem daunting, as baking goes, this is a very easy recipe to prepare. If you’ve never tried it, I definitely recommend this recipe as it is quite difficult mess up!
The first step is to gently heat the butter and milk in a small saucepan. The milk should be just warm enough to melt the butter and no more. Once it has fully combined, remove it from the heat and let it cool slightly.
The dried yeast needs to be added to this mixture and if it’s too hot, it will kill the yeast and the buns won’t rise. The warmth will help the yeast to cultivate and produce the fluffiest hot cross buns. If you have a digital thermometer, about 40-45ºC is a good temperature, otherwise a quick test is to see if you can comfortably hold your finger in the warm milk. If you can, it’s about right. If you’re not sure, just let it cool a little longer to be on the safe side.
Fruit and spice
From talking to friends and family, the filling in a hot cross bun is quite a personal choice. I like mine to be particularly fruity and spicy so my recipe reflects this. However it’s very flexible and you can adjust the quantities of either without negatively affecting the end product.
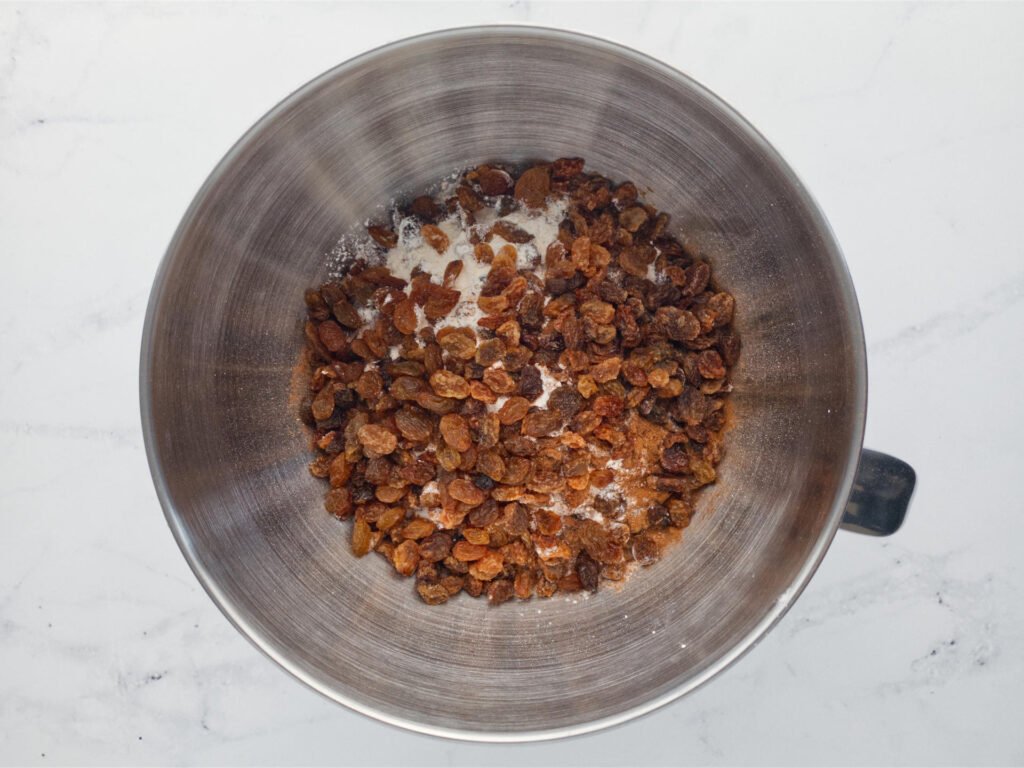
While the milk is cooling, combine all the dry ingredients in a large mixing bowl – the flour, sugar, sultanas and all the spices. I should point out here that the flour I use for this recipe is plain flour, not baking flour. I have tried the recipe using both and have found that baking flour produces less fluffy buns and they have a much denser texture. Therefore I recommend you stick to the plain variety to get the best result.
As I like my hot cross buns to taste spicy, I add quite a bit of cinnamon and mixed spice. In fact, I’ll usually add even more than what I’ve specified in the recipe so feel free to adjust this to your liking to find what’s best for you.
The quantity of sultanas in the recipe will produce buns that are quite fruity and so if this is not to your liking, you can also freely reduce it to whatever level you prefer. If you like your hot cross buns without fruit, you can also simply remove them altogether – the rest of the recipe will still work without any adjustments required. I would caution you not to add more than 300g of fruit though, as the buns will begin to struggle to maintain their shape when baking.
Kneading the dough
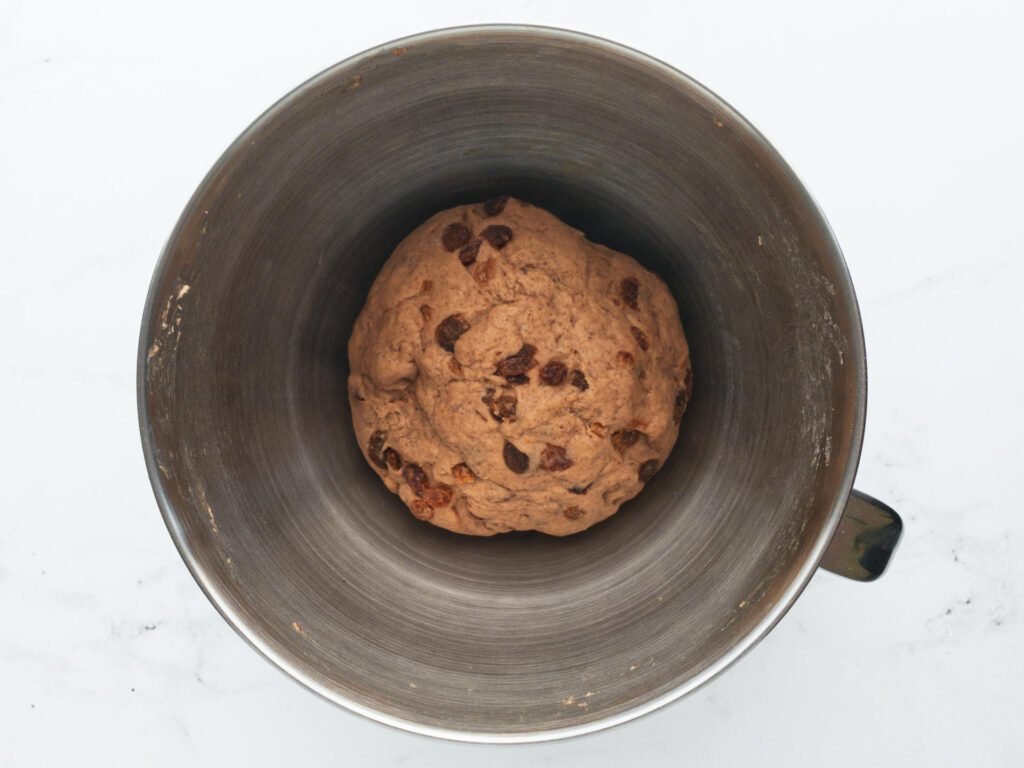
With the dry ingredients ready, lightly whisk an egg and add it into the mixing bowl. At this point you have a choice – you can either mix and knead by hand or use a stand mixer. I’ve made them both ways many times and they work equally well so don’t worry which option you choose.
- Kneading by hand: Add the milk and yeast mixture into the mixing bowl. Using a wooden spoon, stir until everything is well combined. Turn the mix out onto a lightly floured surface and then knead for about 8 minutes, or until the dough is smooth and elastic. You’ll know it’s ready when it springs to the touch.
- Kneading using a stand mixer: If you opt for this method, add about a third of the milk and yeast mixture to the mixing bowl. Then, using the dough hook attachment on your mixer, knead for about 5 minutes on low speed. On my KitchenAid I use speed 1 for this recipe so that it doesn’t damage the sultanas. Over the course of the first minute of kneading time, slowly pour in the remaining milk mixture so that all the dry ingredients are incorporated into the dough. When the dough is smooth and elastic, it’s ready.
With the kneading complete, lightly oil the mixing bowl. Return the dough to the bowl and cover with a tea towel or cling wrap. Place the bowl in a warm, draught-free spot and leave it for about an hour to prove.
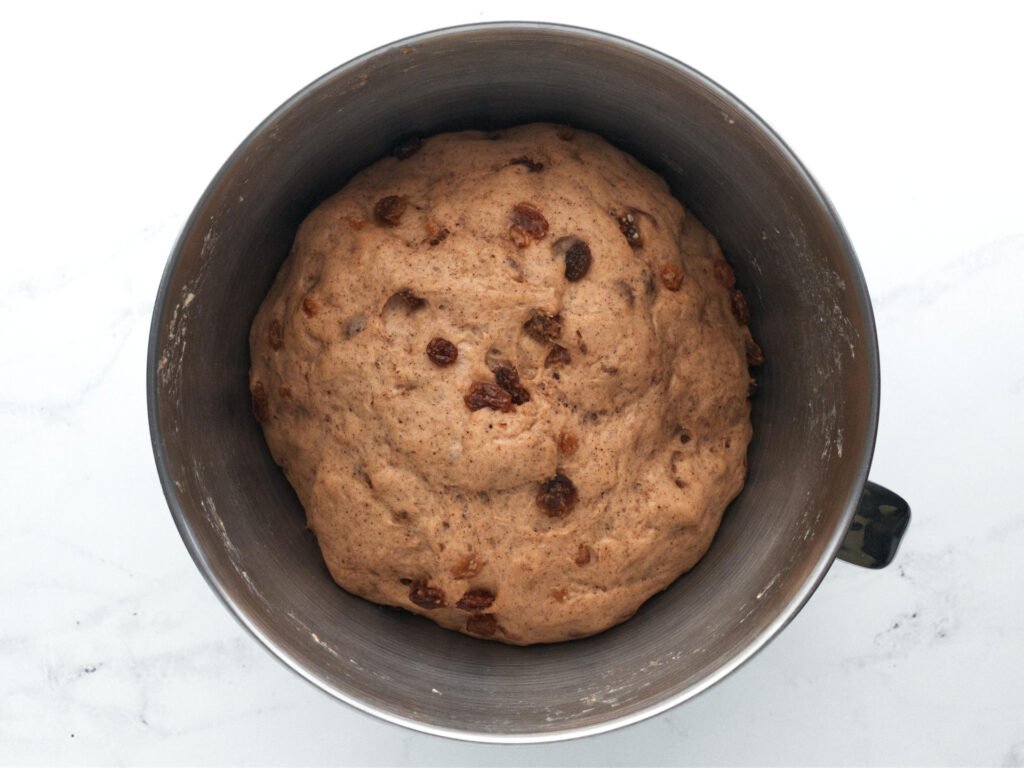
Over the proving time the dough should about double in size. It’s important not to skip this step because if the yeast doesn’t have enough time to do its magic, the hot cross buns will not rise properly in the oven. If the dough hasn’t doubled in size after an hour, leave it for a little longer. If it still doesn’t rise at this point, it could be an issue with the yeast or it’s not in a warm enough location.
⭐️ Enjoying this recipe? Subscribe to my newsletter to be one of the first to receive my latest updates direct to your inbox.
Forming the buns
The next step is to prepare the dough to make buns. Line an oven tray with baking paper. I like to use an oven pan that has sides but a flat tray works just as well.
Take the dough and gently punch it down using your hands to knock some of the air out of it. Don’t worry, this won’t destroy the fluffiness, as they will rise again in the next step. Divide the dough mixture into 12 even portions and arrange them in the pan. I like to weigh the portions as I go to keep them all a uniform size and have found that about 115g per ball is the magic number.
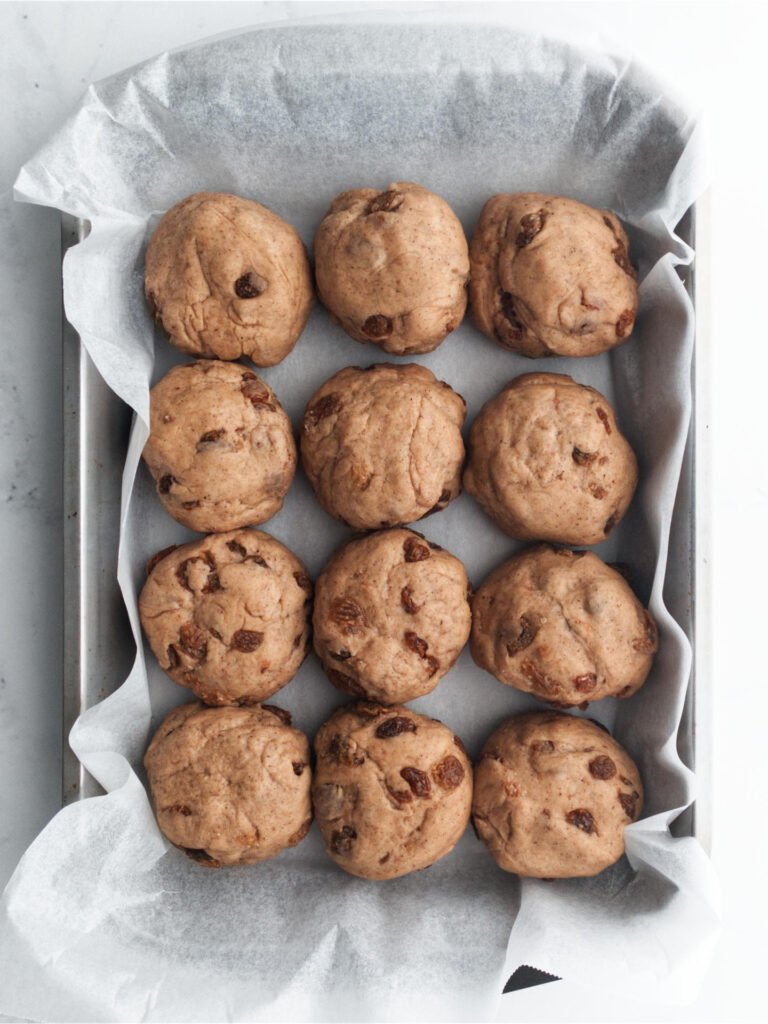
Once all the dough is arranged in the pan, lightly press down on each ball so that they are almost touching. Then loosely cover the pan using the same tea towel or cling wrap from before. You can simply just lay it on top; it doesn’t need to be airtight. Place it in a warm, draught-free spot again and leave it for 30 minutes to rise.
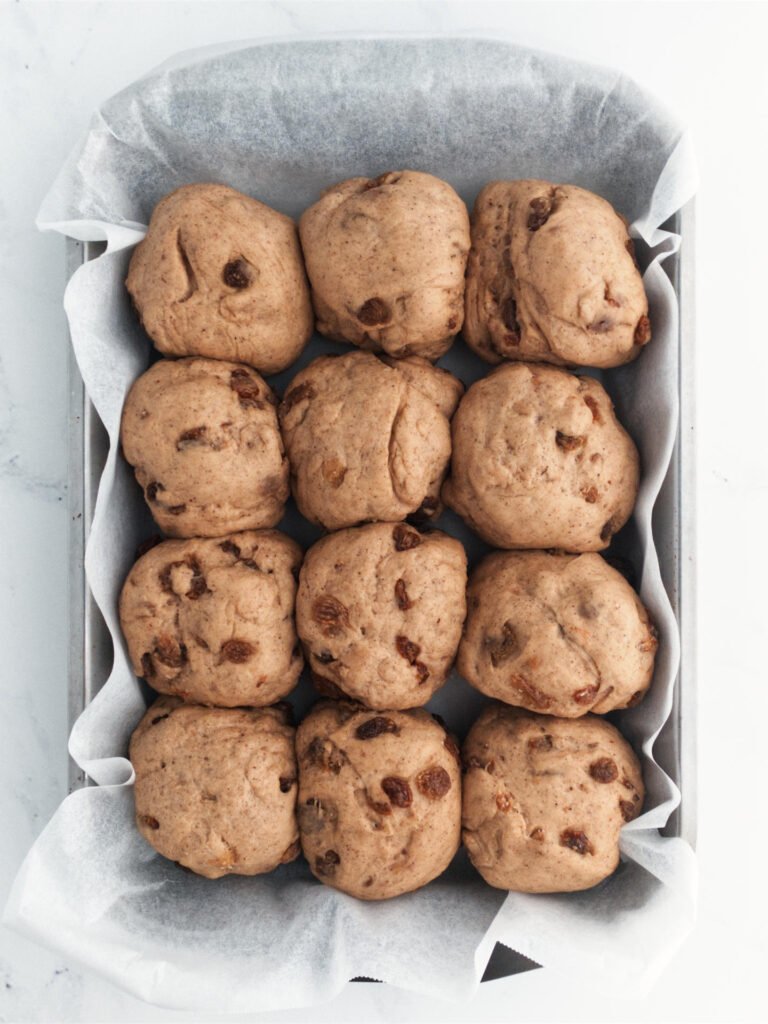
The dough balls should have increased in size by about a third and filled up most of the gaps in the tray. Once again, you can leave them a little longer if they need more time to reach this size but you can use the photo above as a guide.
Adding the crosses
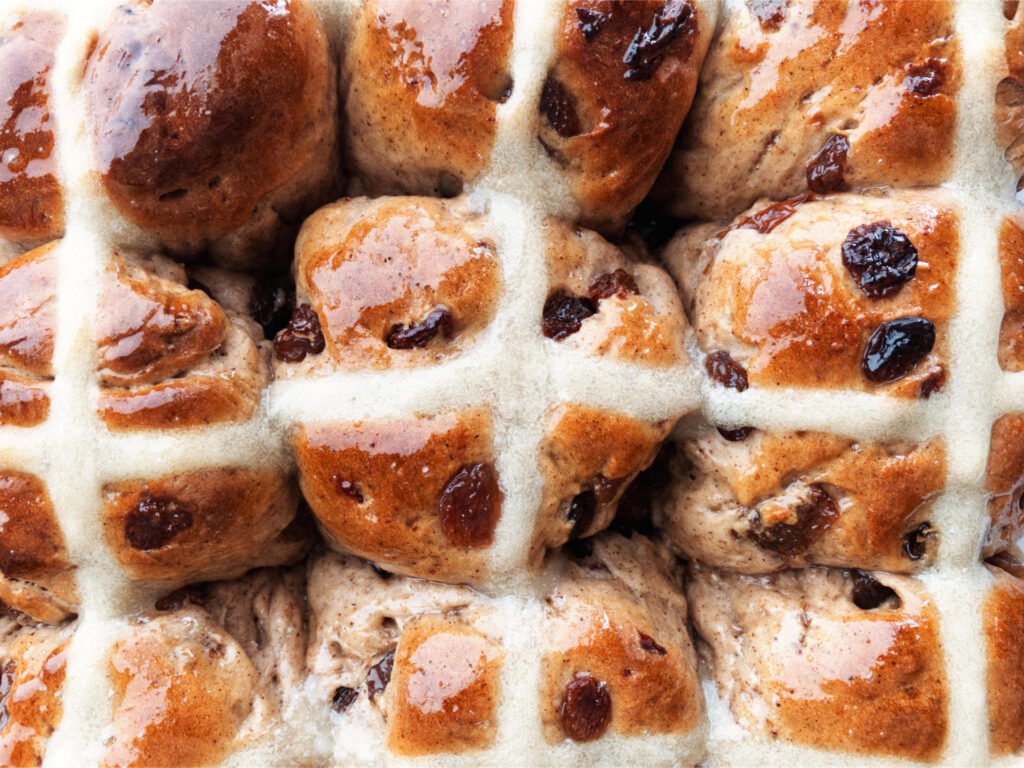
The final step before baking is to add the signature white cross to the top of each bun. You can completely skip this step if you like but they aren’t really hot cross buns without it!
The cross is made from flour paste which is simply flour and water that is mixed in a cup and piped atop the buns. It’s quite important to be precise with measuring the ingredients at this point as the consistency of the paste can be finicky. Too runny and it will roll off the dough when piping; too thick and it will be hard and crunchy when baked. You may have to try this a few times to get a feel for the perfect consistency, but it should be quite thick when combined and not readily drip off the edge of a spoon.
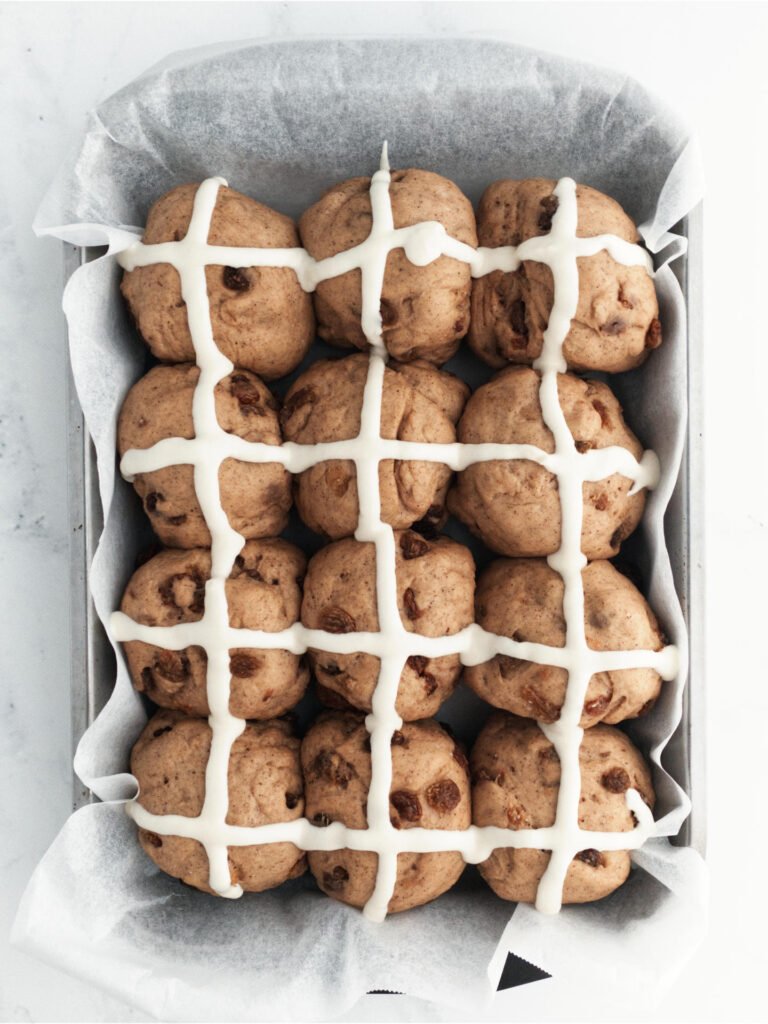
I like to use a resealable snack bag to pipe the paste. The easiest way to do this is to open the bag and place it into a drinking glass with the opening of the bag folded over the rim of the glass. Then simply spoon the flour mixture into the bag. Now remove the bag from the glass and seal it, being sure to remove as much of the air from the bag as possible.
Using scissors, cut off a tiny corner of the bag to make a small opening. It only needs to be about 3-4mm wide in order to pipe. If in doubt, start with a smaller hole and cut it larger if the mixture doesn’t pipe easily. Holding the bag about 5cm above the dough, squeeze gently and move across the pan. Move at a consistent speed and complete the entire line across the pan in one motion. Repeat for each of the other lines. It takes a little practice to hone this skill so don’t be too worried if your lines aren’t perfect as they will settle a little in the oven.
It’s baking time!
It’s time to get the hot cross buns into the oven. Place the tray into a 200ºC oven and bake for 10 minutes. Then reduce the temperature to 180ºC and bake for a further 12-15 minutes. The buns are ready when they have turned a golden brown colour on top and sound hollow when tapped on the bottom.
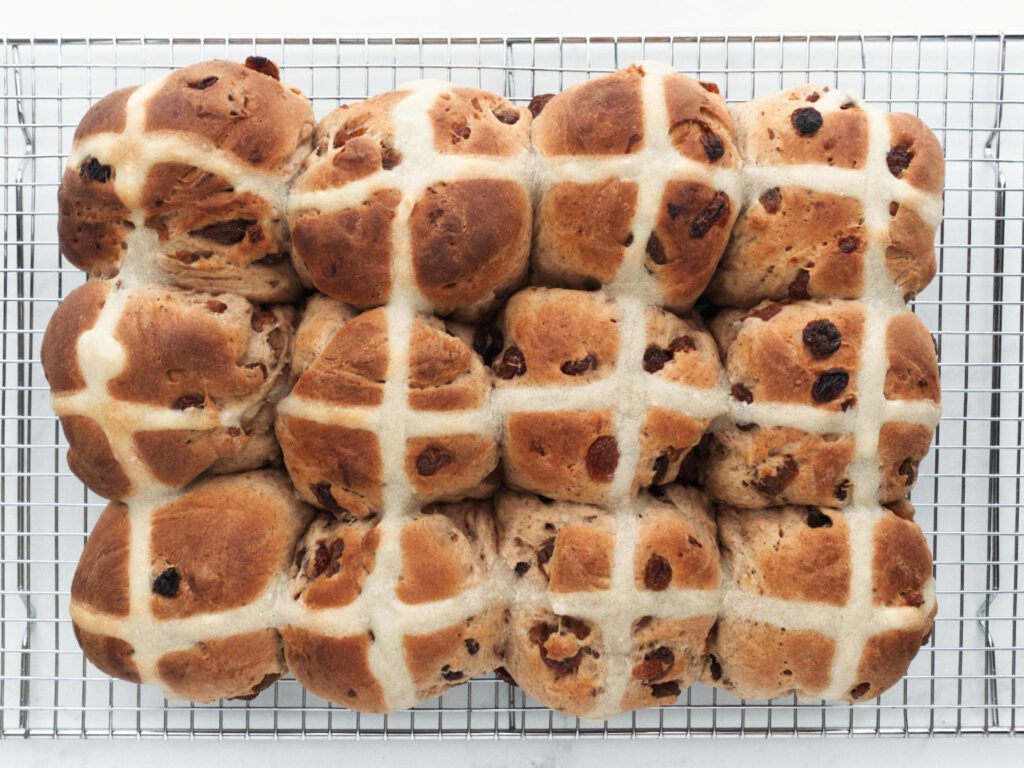
Immediately transfer them to a wire rack to cool for about 10 minutes.
While the hot cross buns are cooling, it’s time to make a quick glaze. Using a small saucepan, combine the sugar, gelatine powder and water over low heat. Stirring it constantly, heat for about 1-2 minutes until the sugar and gelatine has dissolved.
Using a pastry brush, brush the glaze over the top of the cooked hot cross buns until they are evenly coated. If you don’t use all of the glaze, that’s okay. You only need enough to coat the buns and give them a beautiful, shiny appearance. At this point the hot cross buns will look amazing. Yum!
If you don’t have gelatine available to make the glaze, you can substitute the entire glaze for a tablespoon of runny honey that’s ever so slightly watered down, although I prefer the gelatine version because the flavour of the honey changes the taste of the hot cross bun.
Serving hot cross buns
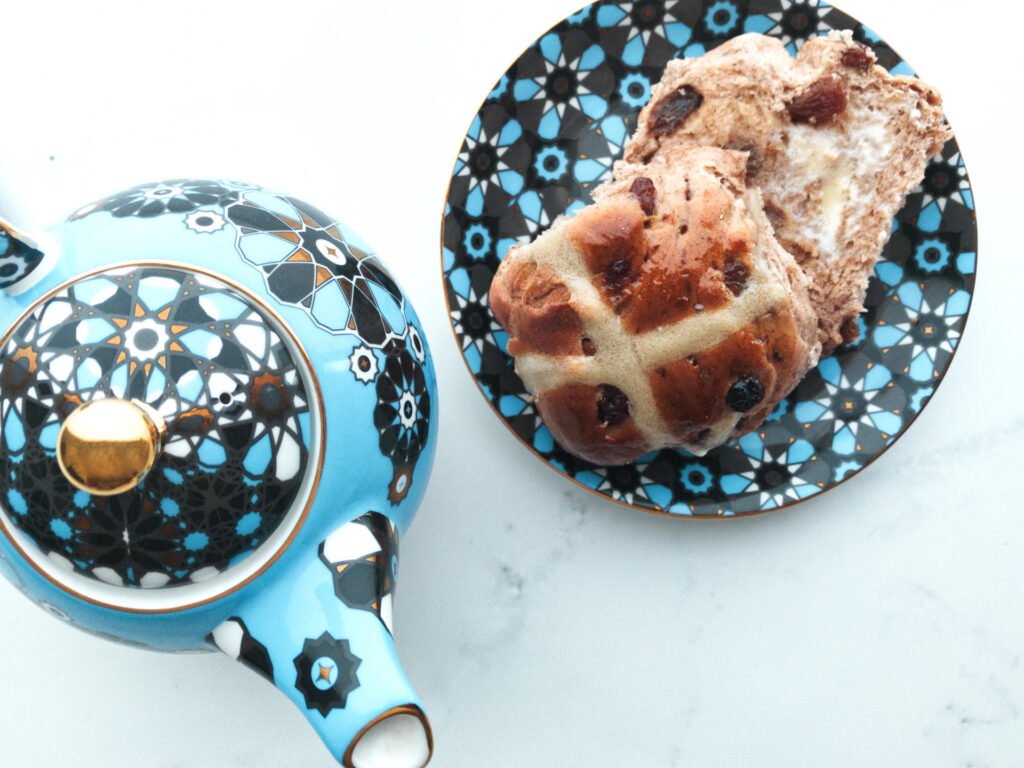
These hot cross buns are best served warm about 30 minutes after they have come out of the oven. I like mine with a good lashing of butter and a cup of tea. They go well at any time of day – a toasted hot cross bun for breakfast is a special treat!
Keep in mind that because these buns don’t have any preservatives in them, they have a relatively short shelf life. They are best eaten on the day they are baked but you can get away with a short 20 second burst in the microwave on day two. After that you’ll find they go a bit dry, however that needn’t stop you from having great buns all the time!
My secret tip is to freeze the buns so you can enjoy them whenever you like. I like to portion them off into pairs, cover them with a bit of baking paper (so that the glaze doesn’t stick), and then cling wrap before placing them into the freezer. Remember to take the hot cross buns out of the freezer a few hours before you’d like to serve, then just zap them in the microwave for about 15 seconds and they’ll be as good as when you first baked them.
Thanks for reading, I hope you enjoy these delicious hot cross buns. Be sure to check out my other baking recipes for more cooking inspiration.

Hot Cross Buns
Ingredients
- 330 ml milk
- 40 g unsalted butter
- 600 g plain flour
- 55 g caster sugar
- 4 tsp mixed spice
- 4 tsp ground cinnamon
- ½ tsp ground cloves
- ½ tsp ground nutmeg
- 250 g sultanas
- 7 g dried yeast
- 1 egg
- 1 dash olive oil, for proving
Flour paste
- 50 g plain flour
- 65 ml water
Glaze
- 1 tbsp caster sugar
- 1 tsp gelatine powder
- 2 tbsp water
Instructions
- Combine milk and butter in a small saucepan over low heat. Warm for 2 mins or until butter melts. Set aside to cool slightly.
- Combine flour, sugar, spices and sultanas in a large mixing bowl.

- Add the yeast to the warm milk mixture and whisk to combine. Let sit for a minute until the yeast starts to form bubbles.
- Lightly whisk the egg then add to the dry ingredients along with the milk mixture and stir until well combined. Turn onto a lightly floured surface and knead for 8-10 mins or until dough is smooth and elastic. If you have a stand mixer, you can knead using a dough hook for about 5 mins on low speed. Transfer to a very lightly oiled bowl and cover with cling wrap. Place in a warm, draught-free place for 1 hour or until dough doubles in size.
- Line a medium oven tray with baking paper. Punch down the dough. Turn onto a lightly floured surface and knead until smooth. Divide the dough into 12 even portions and roll each portion into a uniform ball (about 115g each). Arrange side-by-side in lined pan and press down lightly on each ball. Loosely cover with plastic wrap and place in a warm, draught-free place for 30 mins to rise.

- Preheat oven to 200°C. To make the flour paste, place flour in small jug. Stir in enough water to make a smooth, thick paste. Place in a resealable snack bag and cut off 1 corner to create a 3-4mm opening. Pipe the paste over the buns to make crosses.
- Bake for 10 mins then reduce oven to 180°C. Bake for a further 12-15 mins or until golden brown and the buns sound hollow when tapped on the base. Immediately transfer to a wire rack and set aside for 10 mins to cool slightly.
- To make the glaze, combine the sugar, gelatine and water in a small saucepan over low heat. Cook for 1-2 mins or until the sugar and gelatine dissolve. Brush over the buns. Serve warm with lashings of butter.

Notes
- Serve fresh: The best time to eat these hot cross buns is about 30 mins after they’ve come out of the oven. They’ll be perfectly fluffy and warm. Store any leftovers in an airtight container and consume within 2 days.
- Reheat before serving: The buns are best served fresh, however, if serving the next day, reheat in the microwave for 10-20 seconds to recreate the freshly baked experience.
- Freeze for later: These hot cross buns can be frozen for up to 2 weeks. They are best frozen as soon as they have cooled from the oven. I freeze mine in pairs so it’s easy to only defrost a couple at a time. Cover the glazed part of the bun with a little baking paper and wrap in cling wrap before placing into the freezer. When you’re ready to eat, defrost and place in the microwave for 10-20 seconds.
Have you tried this recipe?
Let me know how it went! Leave a comment below, mention @sthsidekitchen and tag #sthsidekitchen on Instagram. You can also follow me @sthsidekitchen on Twitter and Pinterest.
📬 Don’t forget to subscribe to my newsletter to be one of the first to receive my latest recipes direct to your inbox.
First time trying to make hot cross buns. OMG they tasted beautiful.
Easy enough to make.